
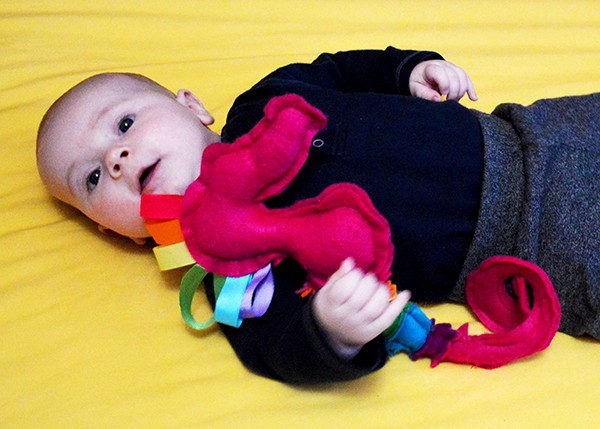
My son is just getting to the stage where not only is he wildly curious about the world around him but his hand eye coordination is now allowing him to reach out and experience that world in a meaningful, tactile way. He loves to explore the curves and twists of fabrics with his fingers and prefers toys that are soft and cuddly for him to hold onto and hug over hard toys which he is less able to manipulate.
At the same time, he was an early teether and so loves nothing more than finding a soft toy with small areas of texture that he can chomp and munch on to help relieve some of that pain and pressure on his gums. Many of the soft toys we have don’t please him because they are just large and smooth-bodied with no intricate areas of interest to him. Because he started teething so early, it has also been hard for him to use traditional teething toys since they are usually larger, hard and heavy – too difficult for my uncoordinated little infant to use in any satisfying way.
To help him self-soothe, I decided to create for him some soft toys with lots of small textured areas and chewable shapes. I picked out some soft chunky felt in a variety of vivid colours because my son loves things that are super soft but I also wanted them to be durable. The bright colours will be fun and engaging for him to look at and will coordinate well with his rainbow and stars themed nursery.
I’ll share with you today my process for creating the first toy and from there you can let your imagination run free to create your own soft toys for your children!
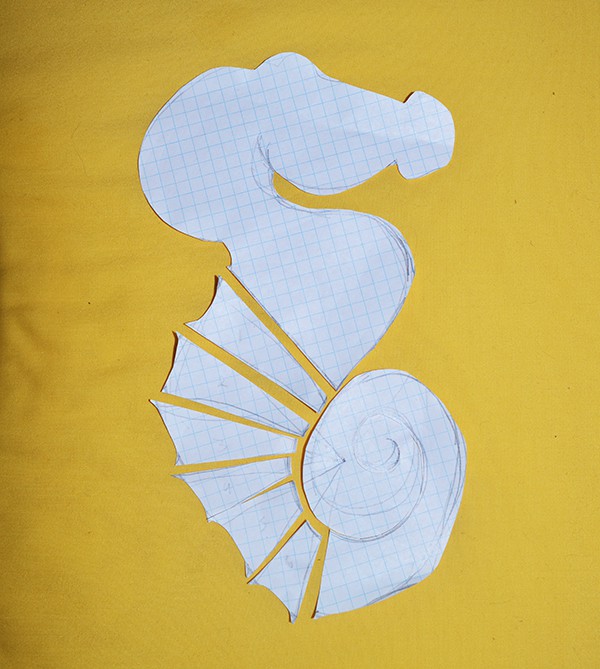

I started out with some graph paper (you can use any type of paper you like but I prefer graph paper because it allows me to make sure everything measures up evenly, which satisfies the perfectionist in me!) My son’s favourite toy is a white unicorn with rainbow accents. He also has a swing with fish on its mobile and he loves them so that inspired me to create a coordinating seahorse which I hoped would be both familiar and stimulating for him.
I drew the outline of a seahorse onto my paper the size I wanted my finished toy to be. I then selected three areas where I wanted to add some interest – the head I decided to add a ribbon loop mane; the body I decided to incorporate smaller striped of other coloured felts to add colour and texture; and the tail I created in a swirl to give my son something to grab onto. I added in these details on my drawing and then cut out the whole thing along each line to create my pattern pieces. I made sure to number my body stripes just in case I got them mixed up, to ensure that the shape stayed the way I wanted it to!
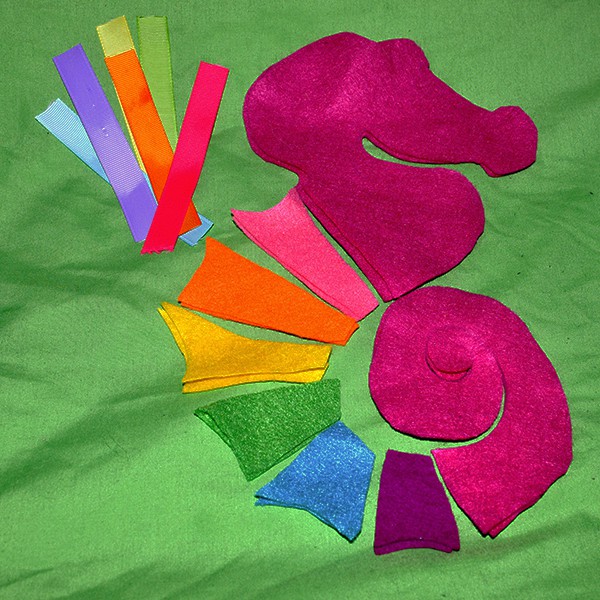
I then laid out my pattern pieces onto my felt and cut around each one twice (for back and front), allowing about a quarter inch around each piece for the seam when I sewed them up. I also cut the ribbon in two lengths so I could sew it into my seahorse’s head.
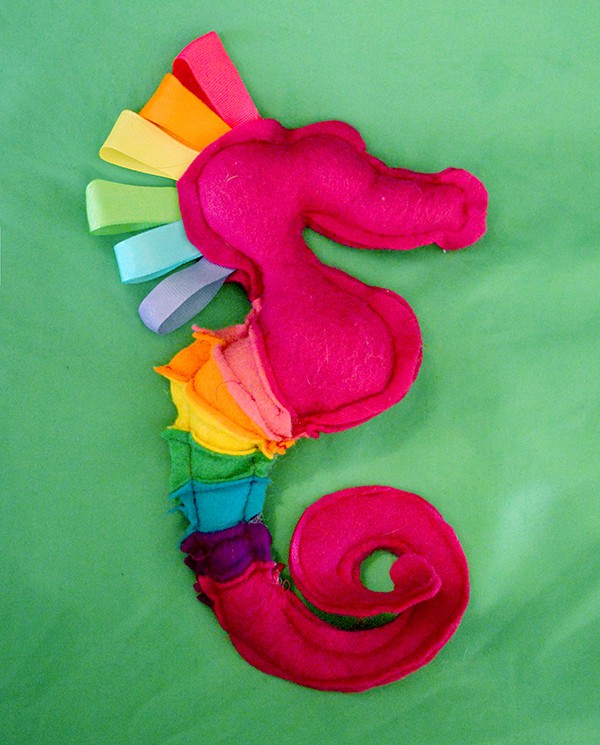
Sewing it up was quick and easy – I started with the body and simply sewed each body piece onto the next until I had the whole length complete, then I sew that onto the tail on the bottom and the head at the top. I then pinned the front and back together. Here’s the easy and very clever part – I pinned it together so that those seams were on the outside of my toy – this will allow for a more textured and interesting toy for you little one, and is also super easy to make because you don’t have to flip or hide any seams! I started with the tail and began to carefully sew up each seam using a straight stitch on my sewing machine. For added interest, I included a bell in the tip of the tail. I continued sewing up the sides, stuffing him lightly with cotton batting as I went and ended before I reach the back of his head. There I pinned in the ribbon loops and sewed straight over them, locking them into the back of the seahorse’s head. Be sure to go over this seam well to ensure that your little one is not able to yank out the ribbons because the whole point of this toy is that he will try to!
Using this same simple approach, you can make any design of soft tag toy you want! Next up, I plan to make a sweet little lion for my son using the ribbon as the main and some fun fur for the tail, and The possibilities are endless!
By Aleisha