
As a first-time mom-to-be with a passion for creative DIY, nesting was one of my strong suits, especially in the last few months as I began to feel a closer connection to my son and his unique personality. From very early on in my pregnancy, I could feel him wiggling and jumping inside of me, in particular, scrunching up his legs and launching himself across inside of me like a little frog! I just knew he would be an active and curious little one – which already in his first three weeks of life he has certainly proven to be. He also was responsive in the womb to different music I would play, getting an early start on his music appreciation and making his music-loving mommy proud!
All of these little details I noted helped me to bond with him before he even got here, and also helped me to get excited about preparing the perfect nursery for him in our home. We decided to go with the theme of rainbows and stars, based on our love of the quotation “When it rains, look for rainbows. When it is dark, look for stars.”
Not only did this theme perfectly reflect the type of positive attitude and values we wish to impart upon our little son, but it also allowed for us to be incredibly flexible in terms of finding coordinating nursery items – if you start out with “rainbow” as a color scheme, EVERYTHING will match and you will never have to be bothered by how that garishly colored toy your Great Aunt gave you clashes with your perfect pastel nursery theme!
More importantly, though, I was keen to introduce bright colors to stimulate my son’s development, and so also chose a dark charcoal grey wall color and black and white details in order to offer high-contrast features in the nursery for my son to use in his very early development stages. Already, he is beginning to take notice of the black frames and white mattes on our nursery art work, and the bright colors of the mobile and toy storage house are also starting to draw his curious gaze.
In this series of posts, I am excited to share with you some of the creative nesting nursery projects I undertook. I’m really proud of how they turned out – not only for their aesthetic accomplishments, but more so for the impact they will have on my son. I am a firm believer in the power that creating a nurturing environment can have on one’s psyche, even for our little ones. I also think that our homes should be designed for living fully in, so I love to create environments which are multi-purpose or which act in both an aesthetic and a functional sense.
One of my first projects came in the form of a surprise acquisition: less than a month after we received the wonderful news that we were expecting a baby, we were given a very pink, very 80’s Barbie Dream House, complete with a hand-crank elevator and outside balconies. I was over the moon excited at this – my husband less so! He was concerned that the doll house would not be something a new born would really need, and he definitely was not keen on the bright pink and purple décor of the house or its tacky plastic accessories.
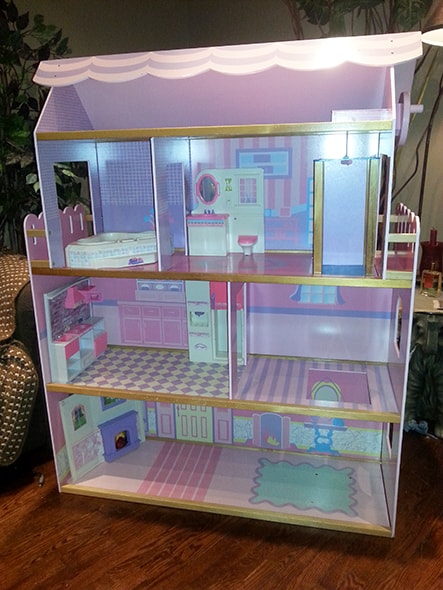
I had a plan though. This Barbie Dream House was already transformed in my mind into a vibrant and cozy Toy Home for our new baby – with each room painted a different color of the rainbow and the elevator acting as a nifty feature to offer our soon-to-be toddler endless hours of amusement and interest.
I started by removing all of the plastic furniture and stripping away the laminate wallpaper interiors. My handy steam iron helped make the job a breeze, but if you don’t have access to one of these neat tools (which I recommend as a staple of life to any parent!) and are faced with a similar paper-stripping task, you can accomplish this by scoring and wetting the paper before peeling and scrubbing it off, or you can simply use the steam function on your standard iron to release the paper and then use a scraper to remove it fully. I also sanded down the light wood trim, softening the edges for our newborn’s protection as well as preparing it for staining to match the dark hardwoods we would be using in the nursery.
I then primed the entire structure with a white base coat before painting each individual room a different rainbow shade using craft paints. I chose to paint the roof in a similar charcoal shade as the nursery walls and the exterior walls in stark white to provide optimal contrast for my newborn’s still developing eyesight.
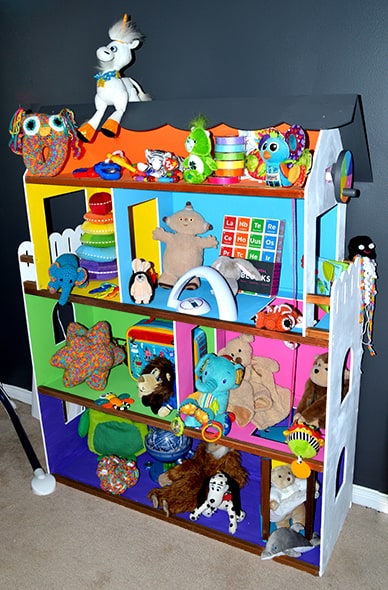
End to end, the revamp was a simple but time-consuming process, with each room requiring numerous coats of paint, but the end result was well worth it! The toy home is a beautiful addition to our nursery, offering all sorts of tactile and visual stimulation to our son, now and as he grows over the next several years. His toys will also have an easy to access storage space now, which hopefully will encourage our son when he is a little older to want to put them away, as they are not simply going into a dark box and put away, but rather, are being put to sleep in their cozy home just as he is at bed time.
In my next post, I look forward to sharing with you some of the adorable toys that I have been making to live in this sweet Toy Home!
By Aleisha